www.magazine-industry-usa.com
07
'14
Written on Modified on
Keyence's image dimension measurement system makes dimensional checks much faster
LISI MEDICAL's plant in Miribel, a French town just outside the city of Lyon, specialises in the outsourcing of surgical implants and ancillary items. Consisting primarily of plates and screws, these parts require precision manufacturing and are inspected by the plant's metrology department. The typical tolerances are in the order of 0.1 to 0.05 mm.

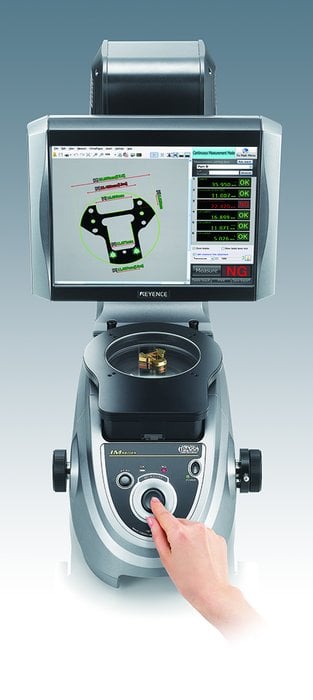
The IM Series image dimension measurement system in question is the second one LISI MEDICAL has acquired for its metrology laboratory. This new type of dimension analysis system combines the speed and flexibility of a vision system with the accuracy of a double telecentric lens, making it possible to obtain high-accuracy, reliable measurements in a minimum of time.
Simply place a target on the stage and press the button. Up to 99 points are measured in a matter of seconds with a repeatability of 0.5 micron. The Intelligent Pattern Analysis Search System (iPASS) determines the position and orientation of targets and compares their shapes against those of recorded targets.
The large 100 mm dual telecentric lens captures entire targets in a single image for simultaneous measurement of all points. This technology allows pixels to be captured as if the lens were vertically positioned. As a result, measurements are not affected by distortions or distance. In addition, measurement data can be saved and exported as reports or to statistical packages. Anything can be measured, from inside diameters, circular pitches and angles to the most complex dimensions.
"The other major advantage to the system is its repeatability," says Mr Lyannaz. "It automatically finds and measures targets, it reduces the risk of error, and it eliminates the risk of measurements being affected by variations in operator skill levels. It gives a single standard for measuring our parts."
Measurement stability is an essential aspect of the IM Series. Adjustment by the least-squares method ensures stable edge detection even if a sequence of edge points is misaligned due to noise or other factors. Another way the IM-6000 Series enables stable edge detection is by ignoring abnormal edge points, even in situations where a target has burrs or chips that lead to errors during the least-squares adjustment. With an accuracy of one-hundredth of a pixel, Keyence's proprietary sub-pixel processing system detects edge positions more accurately than conventional systems. When edges are extracted manually with the naked eye, discrepancies between operators are virtually impossible to avoid. Furthermore, the system measures dimensions without moving the XY stage, thus eliminating vibration-induced errors.
"The system comes ready to use. Its simplicity and Keyence's technical support enabled us to use it to its full potential very quickly," says Mr Lyannaz.

